Showing posts with label Guides. Show all posts

Wednesday, January 2, 2019

Beginner Tips & Tricks! (Part 2d: Magis! - bonus tips!)


Finally we have come to the bonus tips section for "Beginner Tips & Tricks! (part 2: Magis)" ! I will be sharing some tips about awakening magis that have yet to be implemented! This is based on the Japan Version of Dragon Project which is about half a year ahead of Dragon Project Global!

1. Extra Awakening Experience


When awakening with the same magi, the experience you get is significantly boosted! This makes getting duplicates in the same banner just a little less painful actually great as the awakening experience obtained from awakening with the same magi is increased to 10x the original! 

With this, your first duplicate will awaken the magi to +5, and you will only need 4 duplicates to fully awaken the magi!

This is a much needed boost especially since the 2nd copy of active magis are often not used.


Corruption DoT increases with awakening

2. Damage-over-time boosted with awakening

For certain special magis, the damage-over-time effect (e.g. burn/shock) increases with awakening! In this case, the damage with the corruption DoT effect increases by 50% when the magi is fully awakened!


Here is the 2-stage magi that gets a huge boost from awakening!

Earth Corruption Magi

Fire Variant


That's all for part 2 of "Beginner Tips & Tricks!". I hope everyone managed to learn a thing or two from this 4-part chapter!


*images and tweets here are sourced from DP JP's official twitter
This entry was posted in

Beginner Tips & Tricks! (Part 2c: Magis!)


2. Awakening Magi

Once a Magi is fully leveled, it can be further awakened with spare gacha magis!
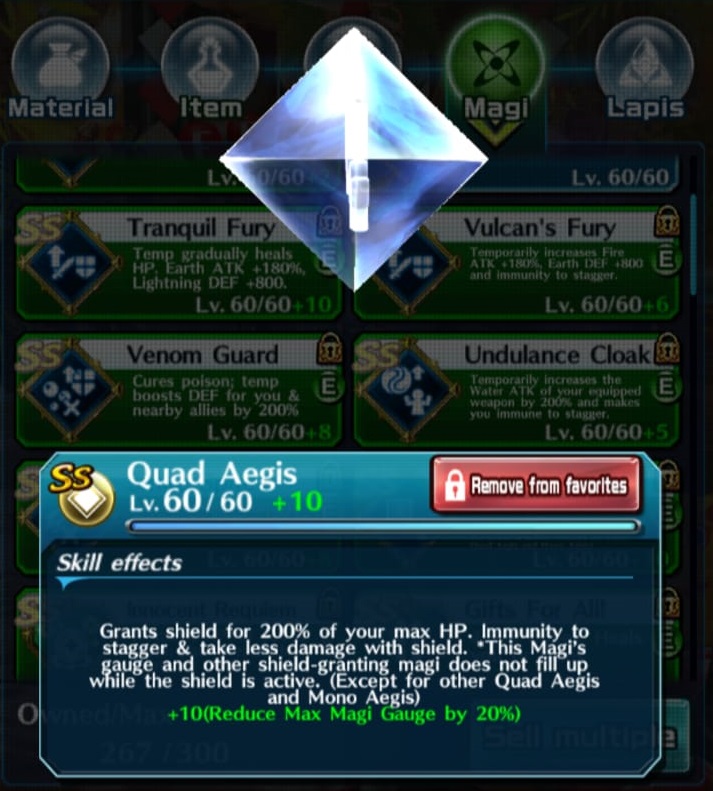
Fully awakened (+10) Quad Aegis

2.1 Faster charge time


Each awakening reduces the max magi gauge by 2%, up to a  20% reduction for a +10 awakened magi!

Awakening magis reduces the Max Magi Gauge. This means that you can charge the magi faster and cast it more frequently!


Awakening attack magi with attack/passive magis

2.2 Awakening Fodder

You can only use actual magis to awaken other magis (magi fodder like magi stone/ fragment/ sand/ residue does not work), so make sure to save your spare gacha magis for awakening purposes!
 
In addition, you can only use same-slot magis for awakening. Attack magis can only awaken other attack magis, and this applies for support magis and healing magis too. Passive magis cannot be awakened, but can be used to awaken attack, support and healing magis. 


2.3 Awakening experience

Below are tables illustrating the experience required to awaken SS rank magis and the amount of experience each rank of magi gives.

Level
Experience required
Cumulative experience required
SS magis required
Cumulative SS magis required
1
90
90
0.5
0.5
2
180
270
1
1.5
3
270
540
1.5
3
4
360
900
2
5
5
450
1350
2.5
7.5
6
540
1890
3
10.5
7
720
2610
4
14.5
8
1080
3690
6
20.5
9
1440
5130
8
28.5
10
1800
6930
10
38.5


Fodder type
SS
S
A
B
Experience given
180
30
5
1


2.4 My Awakening Strategy

Spare magis for awakening are an extremely rare resource, as most of them are obtained via summoning with gems. Thus, make sure to only awaken magis that you are sure you will use for a long time!

In addition, support magi fodders are harder to obtain, so you might want to reserve your passive magis to awaken support magis.


                                                                                                                      Continue to bonus part here
This entry was posted in

Beginner Tips & Tricks! (Part 2b: Magis!)

1.3 Lucky fusion

Once in a while, you may see "fusion successful" pop up after leveling or awakening your magi! When this happens, you get 1.5x the normal exp!

You can use this to your advantage by using 2/3rd the required fodder to try your luck and save some magi fodders!


1.4 Leveling with Gacha magis

Level 30 fodder                         Level 1 fodder
It is also possible to use other gacha magis to level your magis and you get double the exp compared to a same rank fodder. (level 1 S rank magi gives 2 the equivalent of 2 stones when used for leveling)

In addition, a leveled magi provides more experience points in leveling another magi as compared to an un-leveled one, as shown in the figure on the right. This can be useful when replacing old and outdated magis with new ones.


However, I strongly recommend that spare gacha magis be used for awakening instead (especially for level 1 spares), which will be discussed in part 2c of "Beginner Tips & Tricks!".


1.5 My Cost Reduction Strategy

Magi fodders can be hard to earn and it is best to make full use of all of them. My strategy to reduce gold expenditure while leveling magi is to use residue/sand for the first few levels and upgrade to fragments/stones for the last few levels.

The max level for SS attack and support magis is 60 compared to 30 for SS Passive magis. As the cost per fodder scales linearly with the level of the magi, attack and support magis will cost significantly more gold to max out. Thus, I prioritize my magi stones for attack and support magis over passive magis.

Magi fodder is also a resource that is harder to earn than gold, so I suggest trying your luck for a successful fuse to save some fodder too!

                                                                                                                            Continue to part 2c here
This entry was posted in

Beginner Tips & Tricks! (Part 2a: Magis!)

Hey guys, its Deranged again! Today I'll be sharing part 2 of "Beginner Tips & Tricks!". Part 2 is about leveling and awakening magis! Enjoy!

1. Leveling Magi


1.1 Cost of leveling Magi

Did you know that the cost of leveling a magi depends on the rank and level of the magi you are leveling? The higher the level of the magi, the more expensive the upgrade! 

Here you can see that using the same fodder on a level 1 SS Passive magi costs 250 gold, but 5250 gold on a level 21 SS Passive magi! This is a 21x increase, showing that the cost is proportional to level of magi!


Additionally, the cost per use of a leveling fodder doesn't change, be it a magi stone (S) or a magi residue (C)!
As you can see here, magi residue and magi stone both cost 250 gold here from level 1.


1.2 Experience points Required

Below are tables illustrating the experience required to max out SS rank magis and the amount of experience each type of fodder gives.

Magi Type
Attack/ Healing/ Support
Passive
Experience required
460
230
Magi Stones required
23
11.5


Fodder type
Stone (S)
Fragment (A)
Sand (B)
Residue (C)
Experience given
20
5
2
1


*data on fodder required to max level SS attack/support magi provided from Haru from DPS


                                                                                                                            Continue to part 2b here
This entry was posted in

Tuesday, December 4, 2018

Beginner Tips & Tricks! (Part 1: Abilities)

Hey guys, its Deranged again! Today I'll be talking about some beginner tips & tricks that I found very useful while playing Dragon Project. Part 1 will be about some tips & tricks I discovered about abilities! While many veterans should already know the information that I'll be covering, some of these tips are not immediately apparent while playing the game. Hopefully everyone can discover a new thing or two!


Primary & Secondary abilities

1. Abilities re-rolling

Re-rolling the randomly assigned abilities can give you a massive boost in power! Most equipment have the option to gain a secondary ability similar to the primary ability and these are generally the most powerful abilities to have!

As you can see in this image, the secondary abilities (in yellow), provide similar bonuses as the primary ability (in green).

Make sure to stack up these bonuses to maximize your damage while fighting behemoths!


Secondary weapons provide extra stats

2. Weapon abilities

Many players opt to go for 7/7 for their behemoth sets instead of 5/7. This refers to 3 weapons + 4 armour pieces instead of 1 weapon + 4 armour pieces.

Why would players spend their gems to obtain the 2nd and 3rd weapon that they may not be using? This is because the abilities on your 2nd and 3rd weapon do stack, and you receive additional bonuses just by simply equipping them in your armory!

Make sure to evolve and also re-roll your 2nd and 3rd weapons' abilities for maximum bonuses!

Half price on Wednesdays!

3. Half price re-rolling

Re-rolling abilities can be a costly endeavor. It costs 50,000 gold each time to re-roll an SS grade gear. Having many possible combinations, it can cost upwards of millions to get nicely rolled abilities!

However, did you know that re-rolling abilities on every Wednesday is half priced? It costs 25,000 gold from 50,000 gold per re-roll on an SS grade gear.

Make sure to take advantage of this tip and optimize your gear while saving millions!


                                                                              Continue to part 2 of "Beginner Tips & Tricks!" here

This entry was posted in

Wednesday, November 30, 2016

Soul Type Dual Blades

Features:

1. Specializes in elemental attacks
2. Attacks made by Demon Cut and Demon Blast are treated as elemental damage
3. Non elemental attack, magi and armor will be converted to elemental damage when attacking. 

Demon Cut damage increases accordingly to your soul gauge. 
The soul gauge will gradually decrease if no hits are made with Demon cut for a certain period of time and whenever you take damage from the behemoth. 


You can make the behemoth stagger by striking on the WEAK marker with Demon Blast with a full soul gauge. Doing so will also increase the behemoth's Fatigue gauge.


This entry was posted in

Heat Type Dual Blades


You can increase the heat gauge by landing successful hits on the behemoth
You can activate Slayer by holding when the gauge is more than 50% full
Slayer speeds up all your actions, and increases the damage dealt to behemoth by up to 5 times when successively attacking


This entry was posted in

Soul Type Bow

Features:

1. Can perform Lock-on and fire Pure arrows
2. Lock-on can stack a few times at the same spot
3. The more times you lock-on on the same spot, the higher then damage of the pure arrows
4. Specialized in dealing elemental damage


Press and Hold to lock-on the behemoth and fire pure arrows.
You can aim at the same spot 3 times at the same spot to increase damage.
Stacking it 3 times at the same spot and releasing it will turn it into a SPWEAK attack.
Pure arrows fired all deals only elemental damage

Note: The non-elemental values of your character's stat, magi and armor will be converted to the elemental damage your weapon deals


Your soul gauge will increase when the pure arrows hits the behemoths. 
Hawkeye mode (soul mode) will be activated automatically when the soul gauge is filled. 

During Hawkeye mode, your elemental damage is increased and the amount of lock-ons you can do is also increased. The speed at which you can stack your lock-on at the same spot is also increased

Your soul gauge will gradually decrease when Hawkeye is activated and it will end when the soul gauge is depleted.


This entry was posted in

Heat Type Bow

Features:

1. Long distance attacks
2. Damage increases the longer you charge
3. You can aim by sliding while holding. Markers will appear on the field and you can aim anywhere you want. 
4. Pierce behemoth when fully charged
5. Kneeling shot is a 3 shot attack  (Hold while dodging to do a Kneeling Shot) that is faster than a normal standing shot. 
6. Attack varies according to the distance from the enemy 


Hold to activate the Lockdown markers
Shoot all the lockdown markers when fully charged to temporarily restrain the behemoth
When behemoths are restrained by Lockdown, your attack increases and charging time is shortened
Party members can cooperate to shoot the Lockdown markers as they are shared within parties.

The number of Lockdown markers varies accordingly to the behemoth and their status. 
Arrows shot in a Lockdown marker will disappear over time and the time until Lockdown arrows disappears is reduced depending on the number of times the behemoth is restrained.


This entry was posted in

Normal Type Bow

Features:

1. Long distance attacks
2. Damage increases the longer you charge
3. You can aim by sliding while holding. Markers will appear on the field and you can aim anywhere you want. 
4. Pierce behemoth when fully charged
5. Kneeling shot is a 3 shot attack  (Hold while dodging to do a Kneeling Shot) that is faster than a normal standing shot. 
6. Attack varies according to the distance from the enemy 


Hold to make the markers appear and perform Snipe Shot
Shoot the markers when fully charged to inflict continuous damage
Strike the same marker 3 times to deal massive damage


This entry was posted in

Soul Type Spear

Features:

1. Fast dodge and movement speed
2. Normal attacks deals enormous amount of damage but it drains your HP.
Dodge (swipe) > tap attack will not drain your HP
3. However, you can life steal HP from the behemoth with Rend
4. In Annihilation mode (Soul mode), elemental damage is increased and when using Normal attacks, it no longer drains your HP
5. You can around move very quickly by using the dodge > tap action 
(swipe to dodge/roll and then tap and repeat this 2 actions quickly)


The amount of HP you can absorb from the behemoth with Rend varies depending on the duration of how long you charge (press and hold) your attack.
During Rend, you have x2 defense and you are immune to stagger
You will also be invulnerable during the HP absorb action right after your Rend attack lands. 
When charging (press and hold) to use Rend, Soul gauge will decrease at a slower rate during Annihilation mode (soul mode)


Your soul gauge will increase when you hit the behemoth with the normal attacks or the dodge attacks (swipe > tap). 
Annihilation mode is automatically activated when your soul gauge is filled. 
In Annihilation mode, elemental damage is increased and when using Normal attacks, it no longer drains your HP.
Once Annihilation is activated, your soul gauge gradually decreases.
Annihilation mode will end when the soul gauge is depleted


This entry was posted in

Heat Type Spear

Features:

1. Specializes in long-distance attacks
2. Use Onslaught to continously hit the behemoth while dodging
3. Onsluaght's finishing attack is a SPWEAK attack


The difference between Heat and Normal type spear is the movement speed and dodge distance.
Heat spears has greater movement speed and dodge distance. 
A jump cursor will appear if you hold, and moving your finger will allow you to move the cursor anywhere you please. Let go to activate Skyfall
Skyfall elemental damage increases accordingly to the Heat gauge upon activation, and fills the behemoth Fatigue Gauge.
(E.g. Full 3 bar heat gauge deals more damage than 1 bar heat gauge)
You can fill the Heat Gauge when you attack the behemoth. 
(Fill the bar fast with Onslaught attack. Dodge (Swipe) then tap tap tap tap tap)


This entry was posted in

Normal Type Spear

Features:

1. Specializes in long-distance attacks
2. Use Onslaught to continously hit the behemoth while dodging
3. Onsluaght's finishing attack is a SPWEAK attack


Lunge is a fast and long distance thrust attack. 
You can move your finger while holding to choose a direction you want it to charge forward to. 
Lunge strikes the behemoth with multiple hits depending on the distance from the behemoth. 
And if you tap at the right time when hitting a behemoth with Lunge, it will activate another strike combo. (Lunge, Tap Tap Tap Tap. Takes practice to get the timing and distance from the behemoth)


This entry was posted in

Tuesday, November 29, 2016

Burst Type Sword & Shield

Features:

1. Guards against monsters and reduces damage taken
2. Activate Shield Parry will be activated if you time your guard right
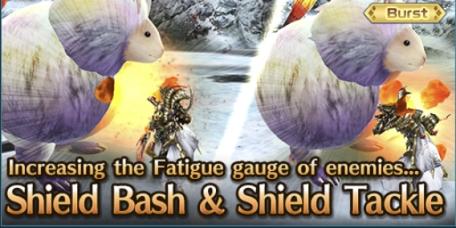
3. Shield Bash and Shield Parry will increase the behemoth's fatigue gauge
4. Behemoths hit by Shield Parry are staggered


The special thing about the Burst type Sword and Shield is that it can attack with its shield.
Shield bash and Shield tackle can increase the behemoth's fatigue gauge. (It can still continue to increase the behemoth's fatigue gauge even when ithe behemoth is fatigued.)

Shield bash is the 2nd stage of your normal attack, and
Shield Tackle can be activated by tapping right after dodging. 


To activate Shield Parry, you must time your guard right. (Right when the behemoth is about to hit you.) Simply hold right before the behemoth hits and let go when it's attack lands. 
Unlike a regular Guard, Shield Parry can prevent status ailments attacks (E.g. Paralysis and freeze) and Behemoth will stagger if you successfully execute the Shield Parry. 

Note: You take the same damage as a regular Guard even if Shield Parry is successful. This does not nullify damage.

Sonic Thrust can be activated by tapping the screen right after a successful Shield Parry. Elemental attack damage and attack speed is temporarily increased for a short period after Sonic Thrust hits. This can be seen in the Burst gauge. The Burst gauge bar will fill and depletes overtime after Sonic Thrust hits. 


This entry was posted in